How to Create Parameters in OIC Scheduled Integrations
You can create and update scalar-type scheduled parameters in scheduled integrations that determine how to batch and read data received from a source location. You then use these parameter values downstream in the integration. You create and assign values to these parameters in the Schedule Parameters page that is available in scheduled orchestrated integrations. You can also assign values to these parameters in assign actions. Up to five parameters are supported in the Schedule Parameters page.
Create Parameters
You can also create and assign scheduled parameters as business identifiers that enable you to track fields in messages during runtime.
Scheduled parameters are available across all scheduled runs of an integration and can facilitate processing of data from one run to the next. For example, when performing batch processing, a scheduled parameter can track the current position of batch data between runs. This value is available across scheduled runs and cannot exceed 256 characters.
To create parameters during design-time:
- On the Integrations page, click Create.
- Select the Scheduled Orchestration style.
- Complete the fields of the dialog, and click Create.
The integration canvas is displayed.
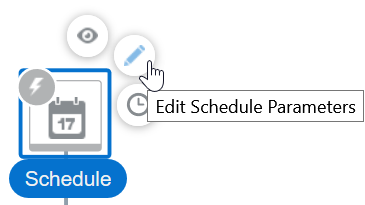
- Click the Schedule icon, then select Edit Schedule Parameters.

. - In the Parameter Name column, click the plus icon.
- Enter a name, an optional description, and a default value in the Value column.
- Click Close to save your changes and exit the page.
If you enter a parameter without a value, a red warning icon is displayed on the Schedule icon. If you place your cursor over the icon, a message indicates that one or more parameters are missing a value.
- Drag an Assign action into the integration, enter a name, and then click OK.
- In the Name column, click +, then select the parameter from the dropdown list that you created without a value in the Schedule Parameters page.
- Click the
 icon to invoke the Expression Builder.
 - Create an expression, then click Close.
- In the Assign page, click Close.
You are returned to the integration canvas.
- Place your cursor over the Schedule icon, and note that the message about the missing parameter value is gone.
Update Parameters
- Go to the Integrations page.
- Go to the row of the integration on which the scheduled run is defined.
- Select Schedule from the
 menu.
menu.The Schedule and Future Runs page is displayed.
- Click the Update Schedule Parameters link in the
 menu.
menu. - Edit parameter values in the New Value column, and click Update.
Override Schedule Parameter Values
You can override schedule parameter values set at design-time when submitting an ad-hoc schedule request or starting a schedule in an activated integration. This feature enables you to provide parameter values while invoking an integration without deactivating it.
To override schedule parameter values:
Access the dialog to override parameter values in either of two ways. If the scheduled integration has defined parameters, the Schedule Parameters dialog is displayed. Otherwise, the dialog is not displayed and the scheduled integration starts.
If submitting an ad-hoc schedule integration, select Submit Now from one of the following locations:
Select Submit Now from the
 menu on the Schedule and Future Runs page.
Click the
 icon on the Monitor Integrations page.
If scheduling an integration, select Start Schedule on the Schedule and Future Runs page.
The Schedule Parameters dialog is displayed.

Description of the illustration scheduled_parameters.pngMake updates to any necessary parameters.
The following fields are displayed:
Parameter Name: Displays the parameter name you provided during design-time.
Default Value: Displays the parameter value you assigned during design-time.
Current Value: Displays the value most recently used at runtime.
New Value: Optionally enter new values for the schedule parameters. This value overrides the current and default values. If this field remains empty, the current value is used. If there is no new or current value, the default value defined during design-time is used.
In the New Value row for the specific parameter, enter a value.
If the integration updates these schedule parameter values using an assign action, the updated value is saved and becomes the current value for the next schedule run.
Click the button that is displayed to save your updates. The name of the button is based on the type of schedule parameter you are updating:
If starting a schedule, click Start Schedule.
If submitting an ad-hoc scheduled integration, click Submit Now.
The values you entered are used during execution of the schedule integration.
