Processing Constraints –Processing constraints is a common security framework in Order Management where you can define and build security rules around sales entities (Line, header , line payments etc).
Using processing constraints in Order Management you can define the conditions and status at which an update can be made to an entity. For example a line cannot be cancelled after it has been shipped. This can be seeded as a system constraint to prevent data corruptions. Similarly you can define constraints that suit your business practices and prevent changes. These constraints can be defined at the entity level and for each attribute.
When you attempt to make changes to an order, Order Management validates the changes against processing constraints enabled. In addition, Order Management validates the order changes based on your user responsibility.
You can check these constraints from Setup->Rules->Processing Constraints
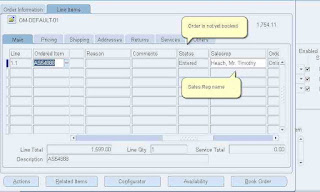
In My example, I will define a processing constraint where salesrep can be change as ling as order is not booked, but once order is booked system should not allow user to change the Processing Constraints.
Setup for Processing Constraints
Step # 1 - Select the Attribute for which you want to define the PC.
Step # 2 - Select the User Actions
The order in which constraints will be evaluated would be the following and only one constraint may take effect for a change
User Action:
1. Not Allowed
2. Requires Reason & Generate Version
3. Generate Versions Only
4. Require Reason & History
5. Require History Only
For example: If multiple constraints are setup for Price List and operation = UPDATE so conditions for both versioning and audit constraint apply, only versioning will be captured.
Step # 3 - Select the Entity for which you want to define PC.
Step # 4 - Choose Record Set
Step # 5- Select the Validation Template , you can define your own Validation template.
Step # 6 – Choose Validation Template
While defining the Validation Template, we have three Options
1.Template based on API
2.Template based on Workflow
3.Template based on Table
Step # 6 – Choose Validation Template
While defining the Validation Template, we have three Options
1.Template based on API
2.Template based on Workflow
3.Template based on Table
1.Template based on API – here we can use and pl/sql procedure for validations.
2.Template based on Workflow
3.Template based on Table - As shown below.
Once you define the validations, generate the constraints.
Example of Processing Constraints - In My example, I will define a processing constraint where salesrep can be change as long as order is not booked, but once order is booked system should not allow user to change the Processing Constraints
Check the screen # 2 to see how to define custom message for a Processing Constraint.


